Ionic can control access to pages and menu options by using Angular Guards and BehaviourSubjects. This adds to the client side user experience by simplifying navigation and providing a first line of defence against unauthorized access to pages on your site, or mobile app. Bear in mind though that Ionic is using client side javascript which can be easily bypassed on a website, so these techniques are very superficial and need to be supported by server side restrictions to private pages and data.
About this app
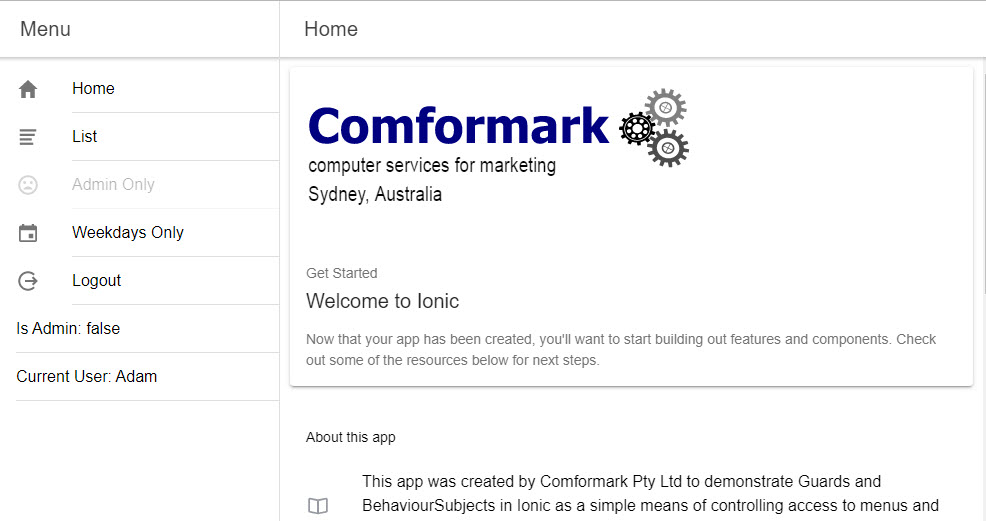
In this app I’ll be creating a simple side menu application with a few pages, and I want to restrict access to some of these pages to logged-in users and/or administrators and one page will be restricted to certain days of the week - just for fun! As well as restricting access to the pages I want to demonstrate modifying the menu according to what type of user is logged in.
To provide this functionality I’ll be making use of Angular Guards and BehaviourSubjects.
What is an Angular Guard?
Angular Guards are part of the Angular Routing and Navigation system, and are user defined functions which control access to pages in applications.
For more details read here https://angular.io/guide/router and more specifically here https://angular.io/guide/router#milestone-5-route-guards
There are multiple types of Guard interfaces that can be used, in this article I’ll be using two:
CanActivate - which controls whether a navigation route will proceed, but still loads the module and CanLoad - which controls whether a navigation route will proceed and prevents LOADING of the route module What is a BehaviourSubject? This site has an excellent definition of a BehaviourSubject http://reactivex.io/rxjs/manual/overview.html#subject...
“An RxJS Subject is a special type of Observable that allows values to be multicasted to many Observers.” A BehaviourSubject is like a global observable, so that when I set or update its value, the value is propagated automatically to all the subscribers I have created for it. This can be very useful for controlling user access, because whenever a user logs in, or out, I can update a BehaviourSubject value and that value will be updated everywhere I have subscribed to it. I’ll be using that technique to control access to pages via Guards and also to update the menu.
Applying Route Guards to an Ionic App
Route Guards are specified as properties of a route. In app-routing.module…
const routes: Routes = [
{
  path: 'list',
  canActivate: [CheckAccessService],
  data: { 'accessLevel': '1' },
  loadChildren: './list/list.module#ListPageModule'
},
{
  path: 'adminonly',
  canLoad: [CheckAccessService],
  data: { 'accessLevel': '4' },
  loadChildren: './adminonly/adminonly.module#AdminonlyPageModule',
},
{
  path: 'scheduled',
  canActivate: [CheckAccessService],
  data: { 'accessLevel': 0, 'scheduled': [1,2,3,4,5] },
  loadChildren: './scheduled/scheduled.module#ScheduledPageModule'
},
{
  path:'login',
  loadChildren: './login/login.module#LoginPageModule'
},
I’ve created a service called CheckAccessService which I use as my only guard. I have specified “canActivate” on two routes, and “canLoad” on the “adminonly” route because I don’t want to load the “AdminonlyPageModule” unless the user is an Administrator. I have used the “data” property of the routes as a means of passing parameters to my canActivate and canLoad functions. Note that canActivate and canLoad are arrays and multiple guards can be specified if necessary.
Creating guards in an Ionic App
In this example app I want to make use of “canActivate” and “canLoad” guards, and redirect to appopriate pages depending on the user’s access levels. To do so I created a new service called CheckAccessService and I need to import the following dependencies…
import { Injectable } from '@angular/core';
import { ActivatedRouteSnapshot, CanActivate, CanLoad, Route, Router, RouterStateSnapshot, UrlSegment } from '@angular/router';
import { AlertController } from '@ionic/angular';
import { LoginService } from './login.service';
…now I need to update the Class declaration by adding the canActivate and canLoad functions…
export class CheckAccessService implements CanActivate, CanLoad {
constructor(
  private loginService: LoginService,
  private router: Router,
  private alertController: AlertController,
) {}
Using a canActivate Guard in an Ionic App
The code for canActivate is quite simple in my example app..
canActivate(ars: ActivatedRouteSnapshot, rss: RouterStateSnapshot): boolean {
  // restrict user access-------------------------------------------------------------
  let canProceed = this.loginService.getUserAccessLevelValue() >= ars.data.accessLevel;
  if (canProceed == false) {
    if (ars.data.accessLevel == 4) {
      this.showAlert('Access Denied - canActivate', 'You must be an Administrator to view this page');
    } else {
      this.showAlert('Please Login - canActivate', 'You must be logged in to view this page');
    }

    // go to the login page, passing the next page to go to
    this.router.navigate(['/login', { 'nextPage': rss.url }]);
    return false;
  }

  // restrict date access-------------------------------------------------------------
  // I pass an array of day numbers - 0 = Sunday. 1-5 = weekdays, 6 = Saturday
  let scheduled = (ars.data.scheduled != undefined) ? ars.data.scheduled : [];
  if (scheduled.length > 0) {
    let dayToday = new Date().getDay();
    if (scheduled.indexOf(dayToday) == -1) {
      this.showAlert('Page Not Available', 'This page is only available on these days ' + scheduled.toString() + '. Today is ' + dayToday.toString());
      return false;
    }
  }
  return true; // It is OK to proceed
}
canActivate is an Angular method that receives two parameters
canActivate(ars: ActivatedRouteSnapshot, rss: RouterStateSnapshot): boolean
The ActivatedRouteSnapshot contains the “data” passed in the Route, and The RouterStateSnapshot contains the “url” requested in the Route.
I’m using the data.accessLevel property to pass the permitted values to the canActivate method and I’m using the url property of RouterStateSnapshot to specify the next page to load, after login, if the user needs to login.
In this function I am getting the current userAccessLevel by calling a function in my loginService this.loginService.getUserAccessLevelValue() that returns the current value of the userAccessLevel BehaviourSubject I defined there, and comparing it to the permitted values passed >= ars.data.accessLevel.
I display an alert to the user if they don’t have the appropriate accessLevel, and redirect them to the login page, passing the page they requested as the next page to navigate to if their login is successful. (The code that handles this is in the login.page).
Passing the next page as a parameter in this fashion means the URL will be /login;nextPage=/list rather than /login?nextPage=/list i.e. the parameter is passed with a semicolon prefix rather than a question mark prefix. If the latter technique is used then a separate route is needed for the login page to ensure correct navigation.
Similarly, the restrict date access section of this code demonstrates applying a canActivate restriction that has nothing to do with the user login, in this case I pass an array of numbers in the Route data property and check if the current date passes the access test. In other words, canActivate can restrict access based on any criteria you want to apply, such as a publication date.
Using a “canLoad” Guard in an Ionic App
The canLoad method receives two different parameters but is otherwise similar to canActivate…
canLoad(route: Route, segments: UrlSegment[]): boolean {
  let url = `/${route.path}`;
  if (this.loginService.getUserAccessLevelValue() == route.data.accessLevel) {
    return true;
  }
  this.showAlert('Access Denied - canLoad', 'You must be an Administrator to view this page');
  this.router.navigate(['/login', { 'nextPage': url }]);
  return false;
}
The technique used here is the same as for canActivate, the difference is that the requested page is contained in route.path parameter (without the forward slash!) and passed data is contained in route.data. I don’t need the UrlSegment in this example, but it might be useful for more complex routing?
The major difference between canLoad and canActivate is that modules are loaded whether canActivate returns a true, or false value, whereas the requested module is only loaded if canLoad returns true. You can verify this using the sample app by looking at the network traffic as the app is used. The AdminOnly.module is only loaded after the Admin is logged in. Note however, that it remains loaded if the Admin logs out.
Creating a BehaviourSubject
This app only has one BehaviourSubject, userAccessLevel, defined in the LoginService. This is how I defined it…
import { BehaviorSubject, Observable } from 'rxjs';
import { Injectable } from '@angular/core';
@Injectable({
  providedIn: 'root'
})
export class LoginService {
  private validUsers = ['Admin', 'Adam', 'Anne', 'Barbra', 'Brian']

  // only maintain the value in this class, nowhere else!
  private userAccessLevel = new BehaviorSubject(0);

  public userDisplayName: string = '';

  constructor() { }
BehaviourSubject needs to be imported from Rxjs and I have declared my userAccessLevel as a private to ensure that its value is only ever changed in this service, which will make ongoing management of my app a bit simpler. I could have declared is as a public variable, which would have the advantage of simplifying the code. A new BehaviourSubject must be created with an initial value, I have set the initial value of userAccessLevel to 0 to indicate that no user is logged in.
The login function My loginUser function is very simple, and I have made it an observable with a one second delay to simulate a “real” login, where a validation request to a server might cause a delay..
loginUser(user: string) {
  // logout existing user, if any, before attempting login
  this.resetUserAccess();

  // check if the name is in my list of valid users
  return new Observable(observer => {
  setTimeout(() => {
    if (this.validUsers.indexOf(user) > -1) {
      this.userDisplayName = user;
      // resetting the BehaviourSubject will trigger the BehaviourSubject observer
      if (user === 'Admin') {
        this.userAccessLevel.next(4);
      } else {
        this.userAccessLevel.next(1); // they are a logged in "user"
      }
    }
    observer.next(this.userAccessLevel.value);
    observer.complete();
    }, 1000)
  })
}
This login is a simple 4 step process…
- Call a function to reset the userAccessLevel
- Check if the user name passed is valid ( in my list of names, simulating a server request in this example)
- Validate the response, if “Admin” set userAccessLevel to 4, otherwsie set it to 1
- Return the userAccessLevel.value to my login page.
Note that the BehaviourSubject value is updated by emitting a new value…
this.userAccessLevel.next(4);
Managing the BehaviourSubject
Because I declared my userAccessLevel as a private, I need some functions to allow other modules to access the values…
getUserAccessLevelValue() {
  return this.userAccessLevel.value; // return the value directly
}
Behaviour subjects have value property which is returned with this function. This is the technique used in the checkAccessService shown above - whenever the value is needed, I call this function.
getUserAccessLevelSubject() {
  return this.userAccessLevel; // return the private BehaviourSubject so I can subscribe to it
}
Some pages in the app might not generate an event where the getUserAccessLevelValue can be called, so another technique is needed. getUserAccessLevelSubject is a function that returns userAccessLevel, a BehaviourSubject, that I can then subscribe to.
resetUserAccess() {
  this.userAccessLevel.next(0);
  this.userDisplayName = '';
}
Finally I have a function that resets the userAccessLevel to 0, and clears the userDisplayName - this effectively logs out any current user.
Managing the Menu with a BehaviourSubject
The app has a side menu defined in app.module and since this is the first module in my app it only gets updated when the app is reloaded. There is no simple event where I can call loginService.getUserAccessValue() to see if a user is logged in. So, what I do instead is subscribe to the userAccessLevel BehaviourSubject in the constructor of app.module…
this.loginService.getUserAccessLevelSubject()
.subscribe((res) => {
  this.isAdmin = (res == 4) ? true : false;
  this.hideLogout = (res == 0) ? true : false;
  this.userDisplayName = this.loginService.userDisplayName;
})
…and I set some local variables depending on the response.
The power of this technique is that a response is emitted by the userAccessLevel BehaviourSubject whenever its value is updated, my local variables are updated automatically.
These local variables can now be used to manage my menu, for example I can toggle whether to show a “Login” or “Logout” link…
<ion-menu-toggle auto-hide="false" [hidden]='!hideLogout'>
  <ion-item [routerDirection]="'root'" routerLink='/login'>
    <ion-icon slot="start" name="log-in">
    </ion-icon><ion-label>Login</ion-label>
  </ion-item>
</ion-menu-toggle>

<ion-menu-toggle auto-hide="false" [hidden]='hideLogout'>
  <ion-item button (click)='logout()'>
    <ion-icon slot="start" name="log-out"></ion-icon>
    <ion-label>Logout</ion-label>
  </ion-item>
</ion-menu-toggle>
Get the App
This app is available as a Github repository from gwbIonic4Guards
View the App in Action
You can try the app from here